
Create Your Own Social Media Analytics System Using ThinkUp and Openshift
![]()
A social media analytics tool is crucial for content creators, companies, organizations, and even government agencies. ThinkUp is one of the most powerful social media analytics tools available. ThinkUp helps you accomplish the following; first, archive and thus search your social media interactions (e.g. tweets, posts, +1s, etc.). Second, analyze visually via graphs and charts your social media insights (for example; who has retweeted you and how many have seen your tweet as of this retweet) which helps you analyze the value of your contacts. Third, it lets you publish and embed conversations on a blog or a website.
To use ThinkUp you can either sign up for their service for a monthly subscription fee (5 $/month) or you can deploy ThinkUp yourself as the software is free and open source. This “How to” will present a step by step guide on how to deploy ThinkUp on Openshift for free, without further ado let’s start.
Requirements
- A free Openshift account, just go to Openshift website and register using your email, no credit card is required.


Steps
- After registering; go to Openshift home page and click on the “MY APPS” on the top of the screen.

- You’ll be directed to your log-in window and enter your credentials, you’ll be directed to a new window click on the blue “Create your first application now” link.

- You’ll be directed to a window, select the “PHP 5.4” tab from the “PHP” menu.

- You’ll be directed to a new window, in the public URL; type the name of the project/application name (e.g. SocialAnalytics, ThinkUp, etc.) in the first space and the domain name (it’s not your real domain name, just any identification name e.g. AwesomeGuy/AwesomeGal) in the second space.

- Under the public URL, there’s the source code slot, just copy and paste the following link “https://github.com/jaboutboul/ThinkUp-OpenShift-Quickstart.git” and it should look like the screenshot below:

- Leave everything as it’s and click on “Create Application” tab at the end of the page.

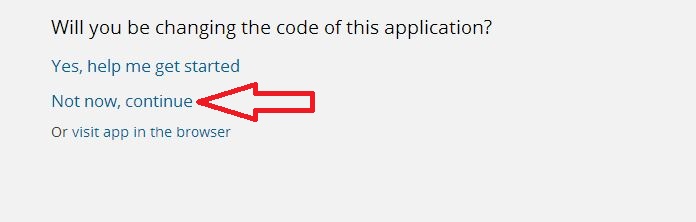
- It will take a while then you’ll be directed to a new window, just click on the blue “Not now continue” link.

- You’ll be directed to a new window where you should add MySQL just by clicking the blue “Add MySQL” link.

- You’ll be directed to a new window, just click on the “Add Cartridge” tab.

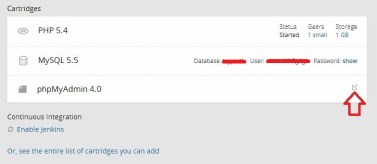
- You shall be directed to anew window where you shall find all of your “MySQL” credentials.

- Now you’ll need to add phpMyAdmin; click on the blue “Add phpMyAdmin” located at the bottom of the same window.

- You’ll then be directed to a new window to confirm the addition of phpMyAdmin, just click on the “Add Cartridge” tab.

- You’ll be directed to the main window again and it’s time to go to your “ThinkUp” installation window, to do that simply click on the blue link at the top of the screen (that’s your URL).

- You’ll be directed to the “ThinkUp” installation window, just click on the blue “Installing ThinkUp”.

- You’ll be directed to a new window, where you should enter your credentials “name, email, password, database username, database password”.
- In that window, you should provide your database credentials, there’s a small trick here which is getting your database server IP, the easiest way to do so is to return to your application and click on the small arrow at the phpMyAdmin tab.
- A new window will popup just copy the number shown in the below screenshot.
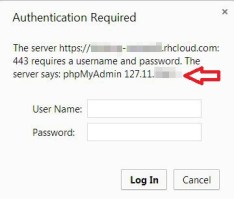
- Paste that number in the database server slot in the ThinkUp installation, then fill in the rest of the information from your database credentials that you can find in your application, then click next.

- You’ll then be directed to a new window, informing you that a confirmation email has been sent to you, just go to your email and open the link.

- You’ll be directed to your sign-in window, just enter your credentials and sign in, after signing in just connect your social media account to your ThinkUp account.


 Now, you’ve a fully functional social media analytics system that’s accurate, secure and free.