![]()
Help Desk software are very useful tools for business owners as they help them manage customers’ complains in an effective way. For small businesses deploying a Help Desk software might be both hard and expensive, and this post is here for the rescue. We shall use osTicket which is a free open source help desk software and the free tier of OpenShift to create a free online Help Desk.
This guide will present a step by step tutorial on how to create a free help desk using osTicket and OpenShift, the only skill you’ll need during the tutorial is your ability to use a web browser.
Requirements
- A free Openshift account, just go to OpenShift website and register using your email, no credit card is required.


Steps
- After registering; go to OpenShift home page and click on the “MY APPS” on the top of the screen.

- You’ll be directed to your log-in window and enter your credentials, you’ll be directed to a new window click on the blue “Create your first application now” link.

- You’ll be directed to a window, select the “PHP 5.4” tab from the “PHP” menu.

- You’ll be directed to a new window, in the public URL; type the name of the project/application name (e.g. HelpDesk, TicketSystem, etc.) in the first space and the domain name (it’s not your real domain name, just any identification name e.g. NickName, YourName) in the second space.

- Under the public URL, there’s the source code slot, just copy and paste the following link “https://github.com/osTicket/osTicket-1.8.git”.
- Leave everything as it’s and click on “Create Application” tab at the end of the page.

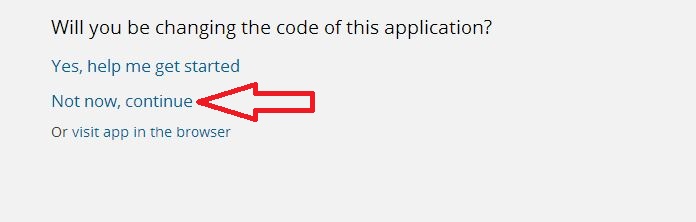
- It will take a while then you’ll be directed to a new window, just click on the blue “Not now continue” link.

- You’ll be directed to a new window where you should add MySQL just by clicking the blue “Add MySQL” link.

- You’ll be directed to a new window, just click on the “Add Cartridge” tab.

- You shall be directed to anew window where you shall find all of your “MySQL” credentials.

- Now you’ll need to add phpMyAdmin; click on the blue “Add phpMyAdmin” located at the bottom of the same window.

- You’ll then be directed to a new window to confirm the addition of phpMyAdmin, just click on the “Add Cartridge” tab.

- You’ll be directed to the main window again and it’s time to go to your ” website” and start the installation process, to do that simply click on the blue link at the top of the screen (that’s your URL).

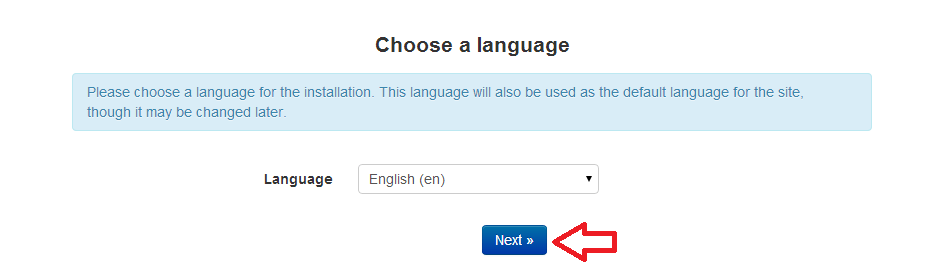
- You’ll be directed to the “osTicket” installation window, enter the required data and click on the “Next” tab.

- Now, you’ve to log into your gear (server) and change the config file name, and of this is your first application on open shift then you’ll need to create a key, if you don’t know how to do that visit this post on OpenShift blog to know how to create the key and SFTP to your server, now after doing that go to your application >> app-root >> runtime >> repo >> include, then change the ost-sampleconfig.php to ost-config.php as seen blow:

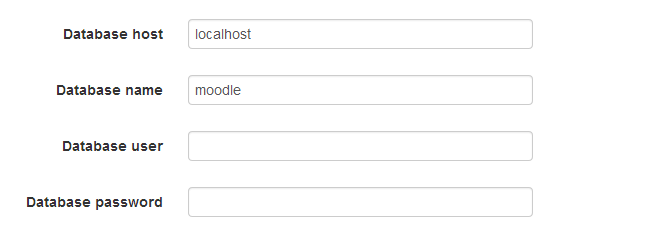
- You’ll be directed to a new window, where you should enter your some information like “password, database username, database password”, you can get this information from step “10”, leave the last field as default.

- In that window, you should provide your database credentials, there’s a small trick here which is getting your database Host IP, the easiest way to do so is to return to your application and click on the small arrow at the phpMyAdmin tab.
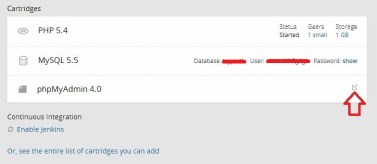
- A new window will popup just copy the number shown in the below screenshot.
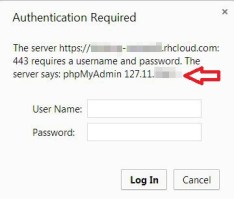
- Paste that number in the database host field in the osTicket installation, then fill in the rest of the information from your database credentials that you can find in your application, then click next.
- You’ll be directed to your osTicket website, a window will also popup with your admin username and password that you can change.


 Now, you’ve a fully functional help desk system via which you can help your customers.