![]()
Update: Please note that ZPanel is no longer maintained by he developers and it’s highly recommended not to use it due to security problems that might arise from not keeping the code up to date , Sentora is a fork of ZPanel that you can use instead.
In the previous tip a step by step tutorial was presented on how to host a Joomla website for free on Amazon Web Services Windows Servers. This tip will present a step by step tutorial with screenshots on how to host multiple Joomla websites for free on Amazon Web Services for free using ZPanel/Ubuntu Server.
There are many advantages to using ZPanel/control panel to host even a single joomla website; first, it’s more secure, you can easily create emails at your domains, you can easily host multiple websites, you can create cron jobs and many other advantages. ZPanel is used in this tutorial as it’s free, easy to install and use. Now without further ado let’s jump into the tutorial.
Ingredients
- Amazon Web Services (AWS) free tier account.
![]()

Steps
- Log into your AWS services console and select EC2.

- You’ll then be directed to the resources window, just click on the blue “Launch Instance” tab.

- You’ll then be directed to a widow where you should choose an Amazon Machine Image (AMI), select “Ubuntu Server 12.04 LTS (PV) –ami-fa9cf1ca (64-bit) / ami-f89cf1c8 (32-bit)“, then click the blue “select” tab.

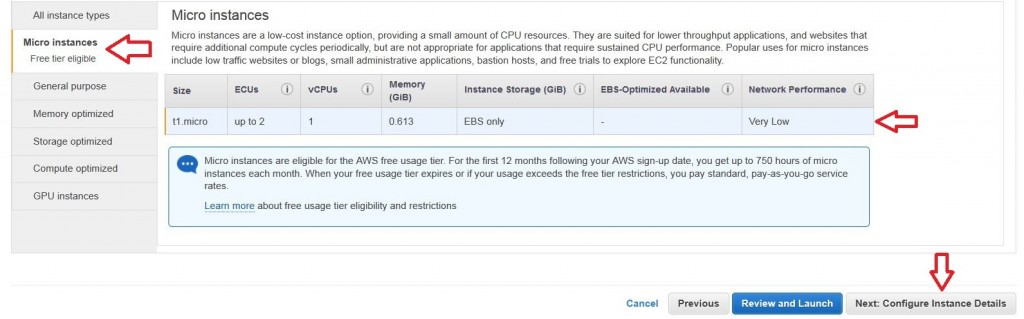
- You’ll then be directed to the window where you should select the hardware, select the micro instance “t1.micro”, then click on the grey “Next: Configure Instance Details” not the blue “Review and Launch” tab.

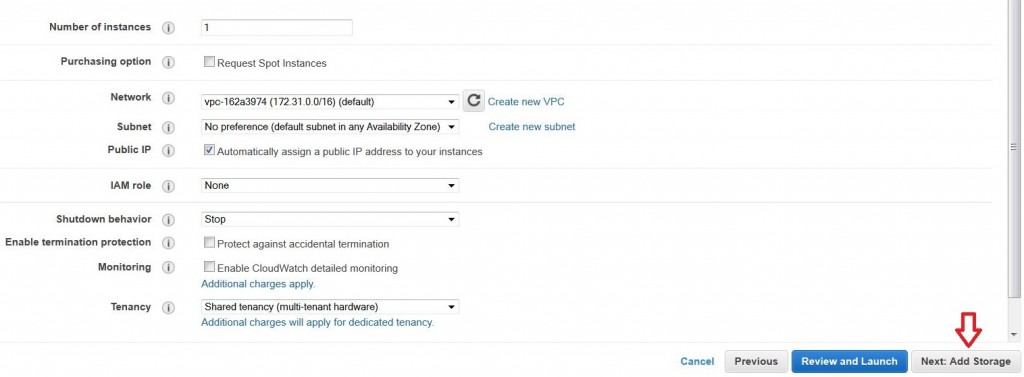
- You’ll then be directed to the configure instance details window, leave everything as it’s and click on the grey “Add Storage” tab.

- You’ll then be directed to the window where you should add storage, just leave everything as it’s and click on the grey “Tag Instance” tab.
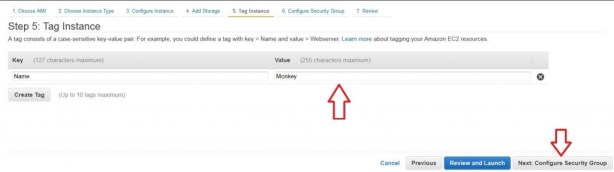
- You’ll then be directed to a new window where you should name the instance, just name your instance whatever you like (e.g. Trial, MyAwesomeServer, etc.), then click on the grey “Configure Security Group” tab.
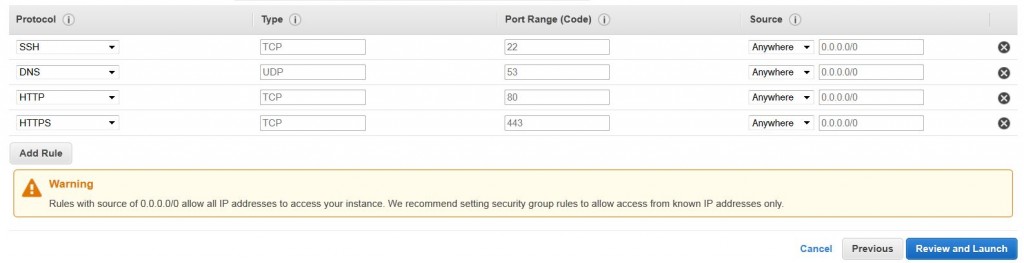
- You’ll then be directed to the window where you should configure the security group; you’ve to add (HTTP, HTTPS, DNS) from the protocol drop down menu, and make sure that you select “Anywhere” from the source drop down menu. It should look like the screenshot below. Then click on the blue “Review and Launch” tab.

- You’ll then be directed to the reviewing window, just click on the blue “launch” tab.
- A new window will appear; first select “create a new key pair” from the drop down menu. Second, name the key pair (e.g. website, MyAwesomeServer, etc.) in key pair name slot. Third, click on the grey “Download key pair” and save it on your local computer (e.g. My Documents, Desktop, etc.), then click on the blue “Launch Instance’ tab.

- You’ll then be directed to a new window, just click on the blue “view instance” tab. The instance takes between 10~20 minutes to be initialized.
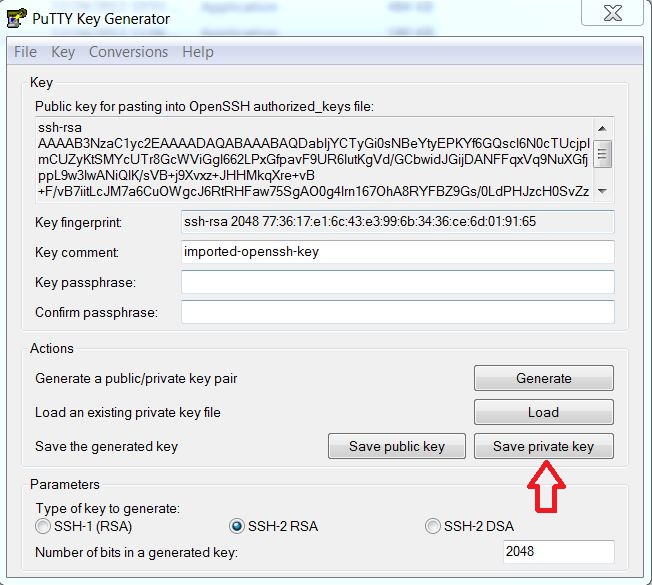
- Now, till the instance is initialized, open the PuTTYgen you’ve download previously, click on the load button and browse to the “key pair” downloaded in step 10, hint: select “all files” when browsing to find the “key pair”.

- Click on the “save private key” that appeared after loading the “key pair” and save that key onto your local computer (e.g. desktop), a warning massage will appear just click on “OK”.

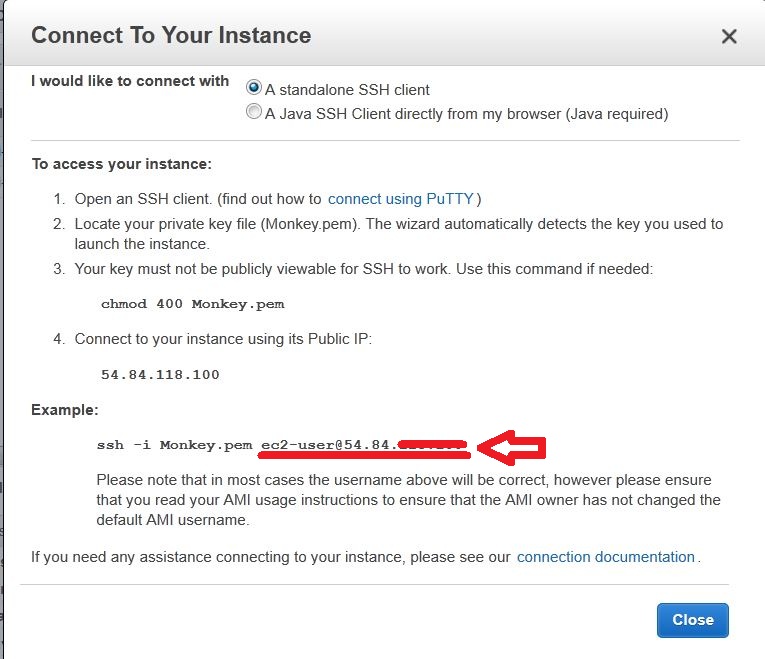
- After the initialization finishes, click on the “Connect” tab in your server console window.

- New window will popup, just copy the address “ec2-user@54.84.xxx.xxx” as seen below.

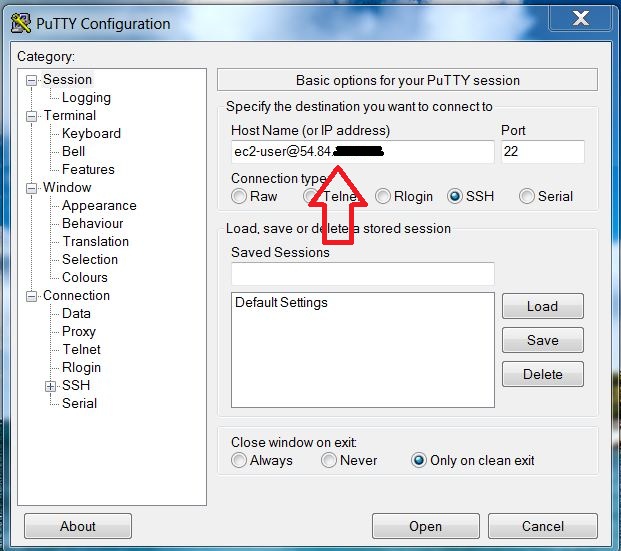
- Now, open PuTTY that you’ve previously downloaded, and paste the address you’ve just copied in the “Host Name (IP Address)” bar as seen below.

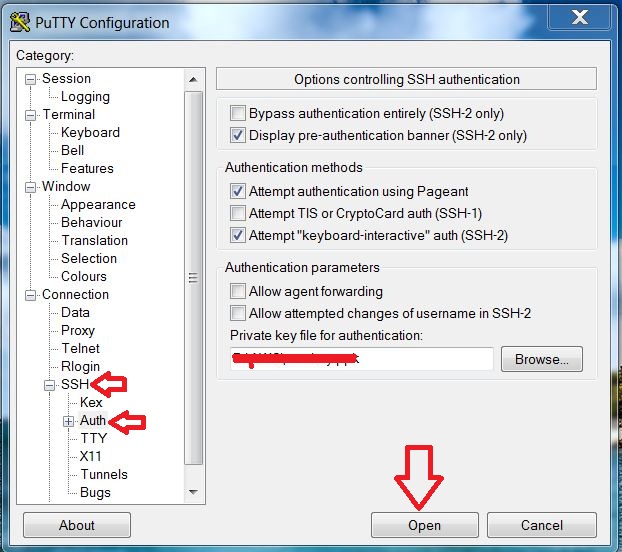
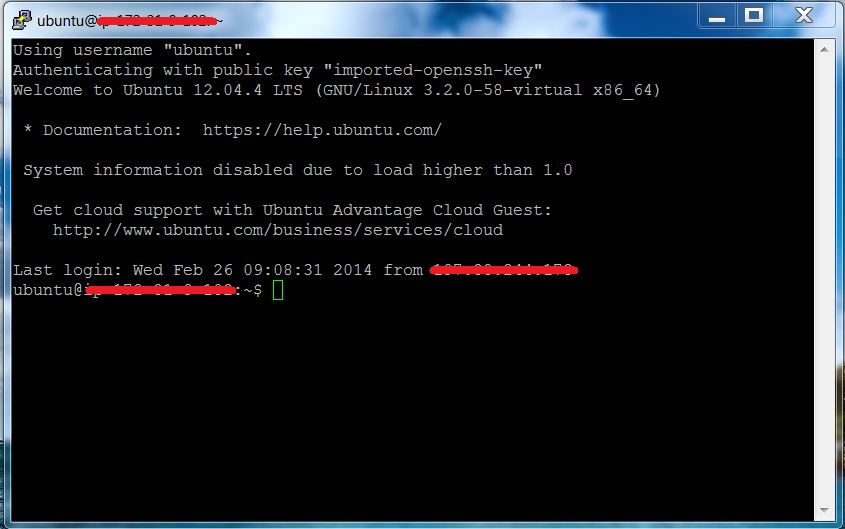
- Now, in the same window but at the side bar you shall find “SSH” click on it then click on the “Auth” in the sub-menu, then browse to the key you’ve created with the PuTTYgen in step “14”, then click open. You’ll then be prompted by a warning message, just click “Yes”.

- Now you’re on your server console (terminal) and it should look like this:

- Now, copy and paste (to paste the commands in the terminal/command prompt window just right click in the terminal) the following commands:


sudo -i
cd
wget https://github.com/zpanel/zpanelx/releases/download/10.1.0/installer-10-1-0-ubuntu-64.sh.x
chmod +x installer-10-1-0-ubuntu-64.sh.x
apt-get install curl at
./installer-10-1-0-ubuntu-64.sh.x
- Now, you’ll see a window similar to the screenshot below, and you’ll be asked 5 questions, just type (Y) as an answer to the first question then hit enter for the following 3 questions and finally type (Y) as an answer to the last question; you’ll be prompted by a message telling you that AppArmor has been disabled. Now, exit the terminal (command line window).

- Go to your instance console window, right click on your instance and then click “reboot”, wait for a couple of minutes and repeat step (17) to re-connect to your server.
- The terminal window will appear now, just copy and paste the following commands:

sudo -i
cd
./installer-10-1-0-ubuntu-64.sh.x
- The same window from step (20) will appear again this time type the following:
To continue please agree to the GPL license (y/n/q)? Y
Find your timezone from: http://php.net/manual/en/timezones.php e.g Europe/London Enter Your Time Zone: Europe/London Just hit Enter.
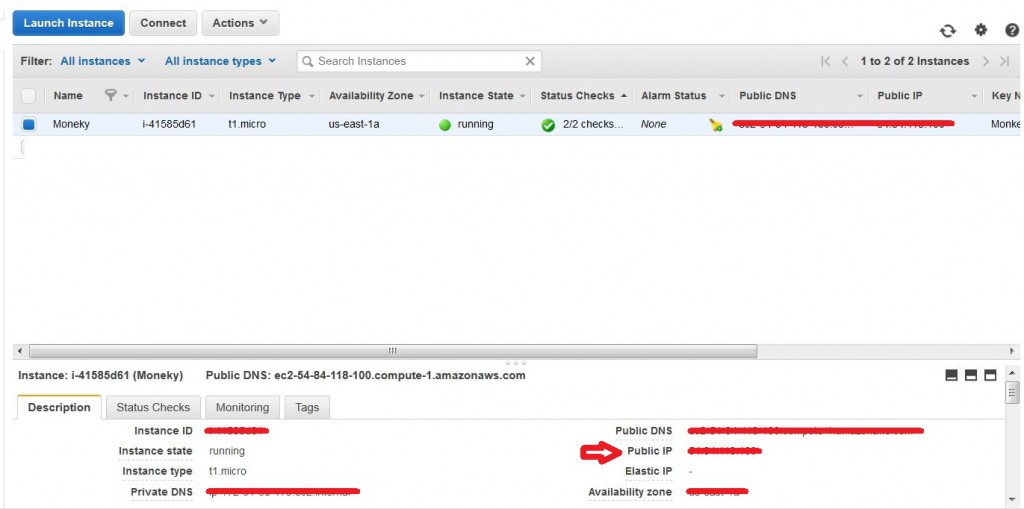
Enter the FQDN of the server: zpanel.public IP (e.g. zpanel.54.XXX.XX.XX); if you don’t know your public IP then jump to step (24).
Enter the Public (external) IP of the server: Just hit Enter
ZPanel will now install, are you sure (y/n/q)? Y
- To find your Public IP, go to your AWS console and you shall find it as seen below in the screenshot.

-
At the end of the installation the following window will appear, copy the data inside the hash/window sign, these are your MySQL and ZPanel credentials and then paste them in a notepad and save it on your local computer.

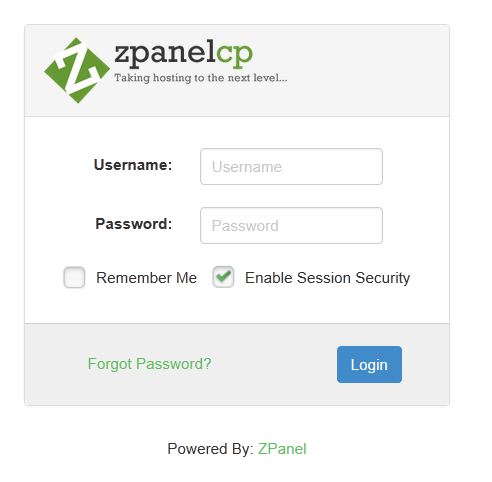
- Now, type your public IP (from step 24) in your web browser, you should be prompted by the following window (if you can’t then you’ve problem in either step 8 or step 23 “FQDN”).

- Enter the credentials (you’ve copied from step 25) and click login, you’ll be prompted by the following window:
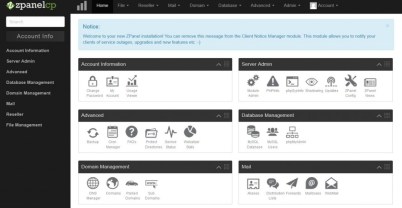
- Congratulations, you’ve succeeded in installing the control panel and now it’s time to install (Zantastico X) to install Joomla.
- Close the ZPanel window in your browser, repeat step (17) to re-connect to your server, and copy and paste the following commands.


sudo -i
cd
zppy repo add modules.zpanelcp.com/repo
zppy update
zppy install zantasticox
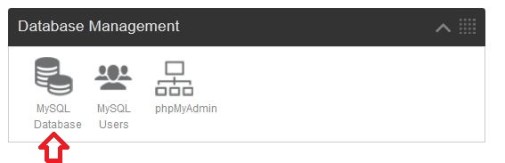
- First, open ZPanel again in your browser (type your public IP in your web browser) in the ZPanel window, click on the MySQL database.
-
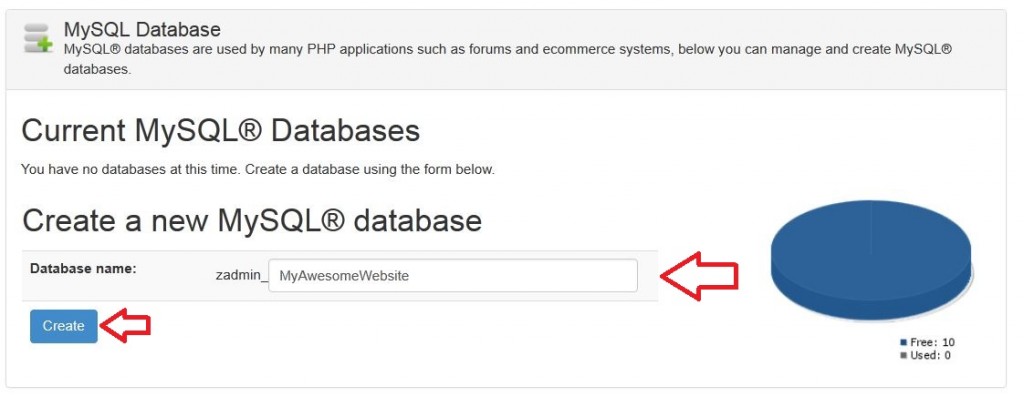
You’ll be directed to a new window; type the name of the database (e.g. MyAwesomeWebsite) in the database name slot and then click on the blue create tab.

-
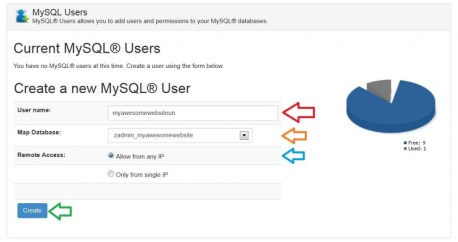
Click on the “Home” tab at the top of your screen to return to your home page; click on “MySQL Users” tab.

-
You’ll be directed to a new window; type your MySQL username (e.g. Joomla), then select your database name from the drop-down menu; finally click on the blue “create” tab.
-
On your ZPanel console go to the “Home” window; click on the “Module Admin” tab.

- In the “Configure Module” window, go to (Zantastico X) and tick the check boxes beside it, go to the bottom of the window and click on the blue “save changes” tab.

-
Return to the “Home” ZPanle window, and click on “Domains” in the Domains Management tab.

- You’ll be directed to a new window; type your domain name (e.g. myawesomewebsite.com) in the domain name slot and then click on the blue “Create” tab.

- Note: if you’ve already registered your domain name (e.g. myawesomewebsite.com) and you click on its blue link seen below, you’ll be directed to your domain name registrar to setup your DNS. But you’ve not registered your domain name yet then you’ll be redirected to your ZPanel home console.

-
Now, it’s time to install your first Joomla website; go to your ZPanel home console, then click on Zantastico X in the advanced tab.

- You’ll be directed to a new window, just choose “Joomla” and click on the install tab.

-
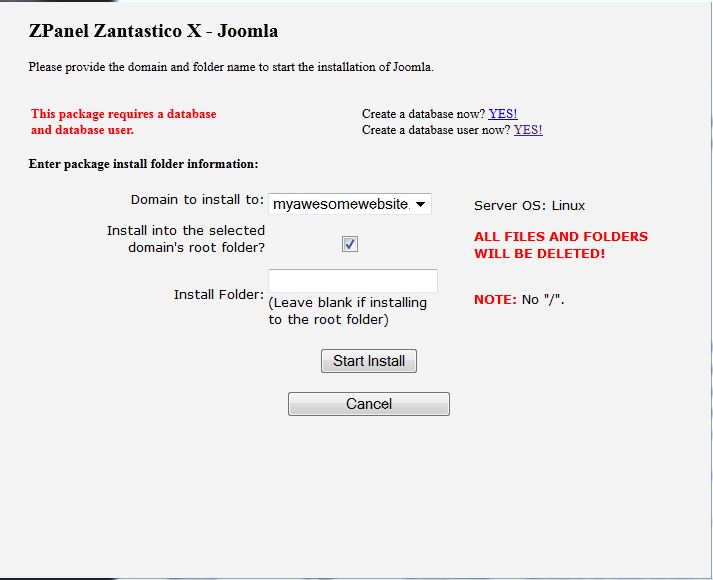
A new window will appear, just choose the domain you want to install Joomla on (e.g. MyAwesomeWebsite) and then check the “install into the selected domains root folder” and click on the “Start Install” tab.

- The installation will start and then you’ll be prompted by a new window, just click on the “Install” tab.

-
You’ll be directed to your domain and you shall find the following window to start the Joomla installation, if you don’t know how to use Joomla then I’d recommend starting from here.

- If you want to add a new site then repeat the steps (30 – 40 excluding 35).


Now, you’ve a secure and fully managed website that you can easily scale and it’s hosted for free. You can start creating your email address at your domain (e.g. awesomeguy/gal@MyAwesomeWebsite.com), FTP to the server, access phpMyAdmin and do anything you used to do on your previous shared hosting environment.