
How to Host a WordPress Website for Free on Openshift
![]()
The previous two “How to” were step by step tutorials on how to host a WordPress website for free (only for one year) on Amazon Web Services (AWS) on both Windows Server with IIS and Amazon Linux. AWS is an IaaS (Infrastructure as a Service) market leader and hosting a WordPress website for free on their platform has many advantages.
This “How to” will present a step by step tutorial on how to host a WordPress website for free (forever! No credit card is even required) on Openshift. Openshift is a PaaS (Platform as a Service) market leader. The service allows anyone to host a WordPress website for free without the need of a credit card and without anytime restriction of course you’ve restricted resources (1 GB of storage and 512 MB of RAM) and that’s quite enough to host a WordPress website, in case the website grew and you want to scale you can easily do that for a very affordable price. Without further ado let’s dive into the steps.
Ingredients
- A free Openshift account, just go to Openshift website and register using your email, no credit card is required.

Steps
- After registering; go to Openshift home page and click on the “MY APPS” on the top of the screen.

- You’ll be directed to your log-in window and enter your credentials, you’ll be directed to a new window click on the blue “Create your first application now” link.

- You’ll be directed to a window, select the “WordPress 3.x” tab from the “Instant App” menu.

- You’ll be directed to a new window, in the public URL; type the name of the project/application name (e.g. MyAwesomeWebsite, WordPress, etc.) in the first space and the domain name (it’s not your real domain name, just any identification name e.g. AwesomeGuy/AwesomeGal) in the second space.

- Leave everything as it’s and click on “Create Application” tab at the end of the window.

- It will take a while then you’ll be directed to a new window, just click on the blue “Not now continue” link.

- You’ll be directed to a new window where you shall find all of your credentials (MySQL password, database name and root user, etc.), copy them to a safe location on your local computer.

- Now you’ll need to add phpMyAdmin; click on the blue “Add phpMyAdmin” located at the bottom of the same window.

- You’ll then be directed to a new window to confirm the addition of phpMyAdmin, just click on the “Add Cartridge” tab.

- You’ll be directed to the main window again and it’s time to go to your website and install WordPress, to do that simply click on the blue link at the top of the screen (that’s your URL).

- You’ll be directed to the WordPress installation window.


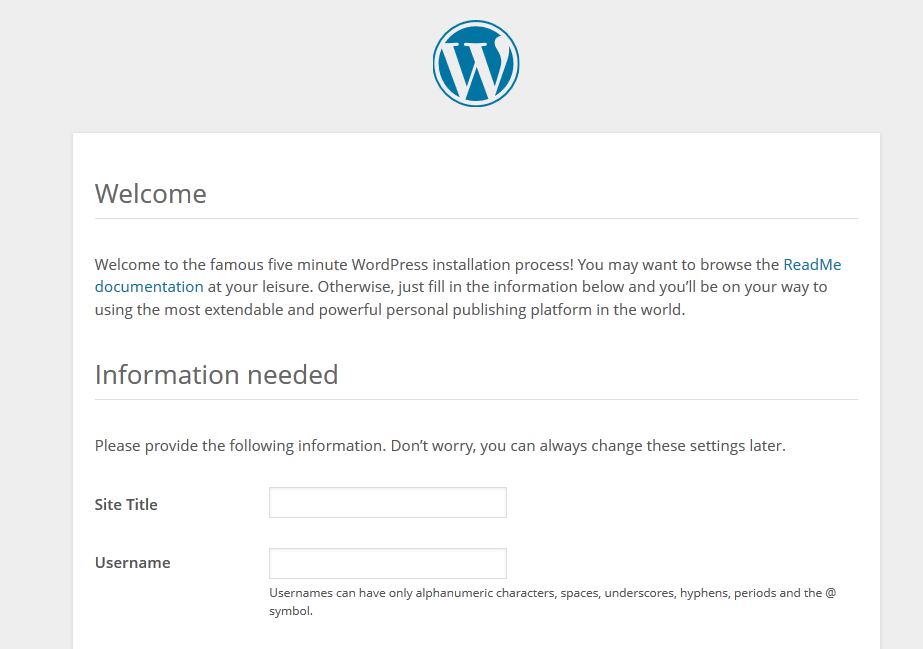
Now you’ve a fully functional and free hosted WordPress website. Now, there are some side notes:
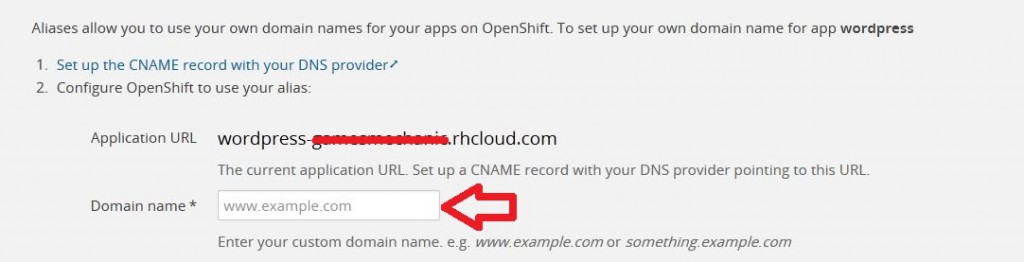
- To direct your new website to your own domain (e.g. www.example.com), simply put your Openshift address (xxxx-zzzz.rhcloud.com) in your CNAME record in your domain registrar panel, then open your panel and click on the blue “Change” link.

- You’ll be directed to a new window; type your domain name in “Domain Name” field on Openshift.

Now, to create a public key to connect to the server; follow the following steps (the steps are for Windows machines):
- First download PuTTY and PuTTYgen.

- Download Git and RubyInstaller.
- Go to the command prompt in windows (go to the start menu and type cmd in the search bar then press enter), and type the following commands:

gem install rhc
gem update rhc
![]()
- Go to the command prompt (make sure that you’re at the Git directory) and type the following command:
rhc setup

- Your public key will be created and uploaded to Openshift; you can find the key on your local computer in the following directory “C:Usersyour_computer_username.ssh”.

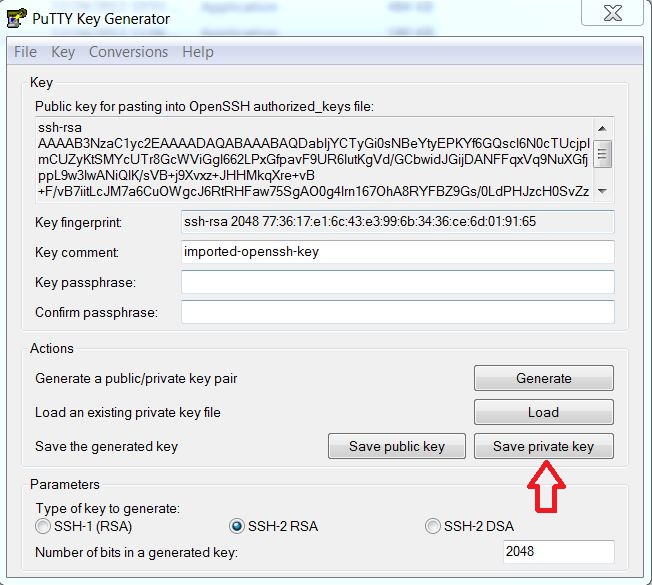
- Open PuTTYgen you’ve downloaded in the step (1), and go to the conversion on the top menu then go to “import key” and browse to your public key (the one from the previous step id_rsa).

- Then click on the “save private key” tab and save it with your public key.

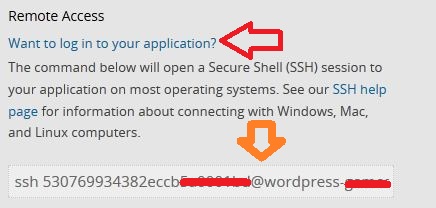
- Go to your Openshift panel and click on your WordPress application, on the right hand side and lick on the blue “Want to log in to your application?” and the following drop down menu would appear, just copy the line that starts with “ssh” and paste it in a notepad.

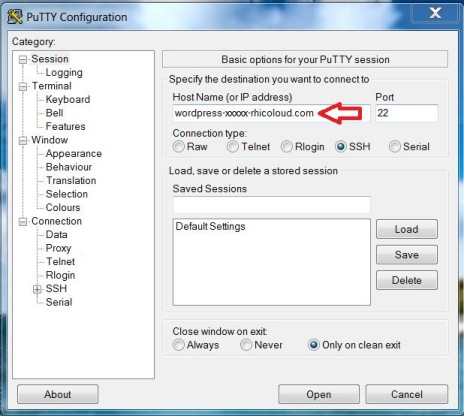
- Open PuTTY (you’ve downloaded in step “1”), and paste the values after the (@) from the ssh number you’ve just copied in the Host Name field in PuTTY.

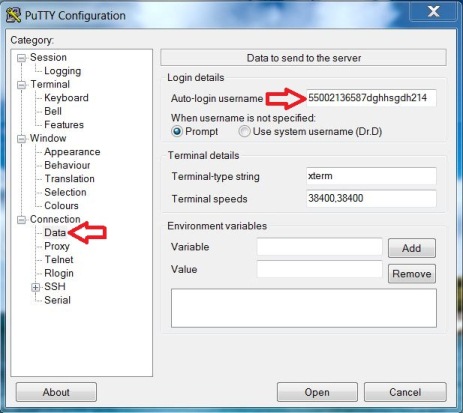
- Inside putty go to “Data” in the sub-menu under “connection” and paste the values before the (@) you’ve copied from step (8) in the auto login-username tab; note don’t paste (ssh).

- Inside PuTTY go to “SSH”, then “Auth” sub-menu and browse to the key you’ve created in step (7); then click on the “open” tab.


Now, you’ve a fully functional WordPress website that’s hosted for free on Openshift and you’ve full access to your gear in case you want to access anything.