
How to Plan Office Space, Store Space and Home Renovation Online Part Two (Space Designer 3D)
![]()
Space Designer Is no longer free, so if you need a free option please refer to other software like HomeByMe
In the first part of this “How To” we’ve presented the struggle that many Businesses, stores, and homeowners face while planning office space, store space, and home renovation. And we’ve presented HomeByMe.com as a free online solution that anyone can rely on while planning office space, store space, and home renovation.
This post will present Space Designer 3D; the second free online tool that anyone can use while planning office space, store space, and home renovation. It’s worth noting that while HomeByMe.com was suitable for entire home planning, Space Designer 3D is only suitable for room planning, so if you want to design a large office or home with many rooms then this tool isn’t for you. A full list of the pros and cons of this tool will be presented at the end of the post, and without further ado let’s dive into Space Designer 3D.
Planning Office, Store, and Room Space Using Space Designer 3D
Preparations
Unlike HomeByMe.com there are no pre-requests to start using Space Designer 3D, just go to the website and register using your email and you’re ready to go.

Getting Started with Space Designer 3D
Plan a Conference Room
We’ll be planning a conference room using Space Designer 3D, giving you a general idea about the tool interface and capabilities.
- After logging into your account using your email and password, you’ll be prompted by a new window, select “New Project”.

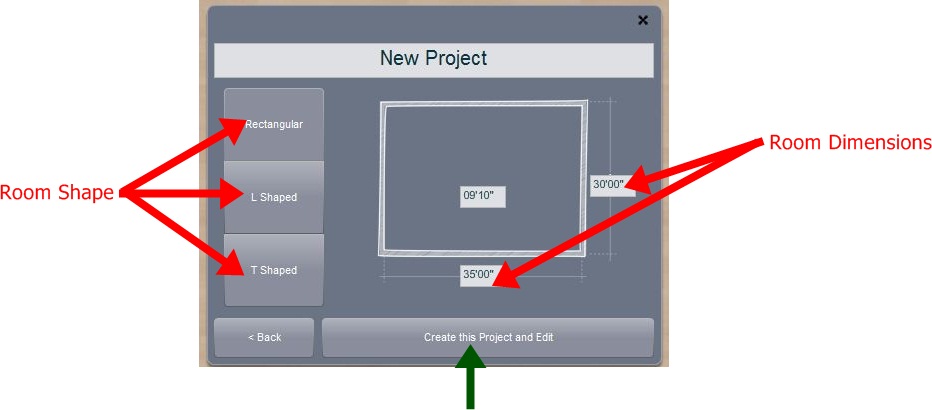
- A new window will appear where you should select the shape of the room, there are only three options here a rectangular, T-Shaped, or L-Shaped room (this is one of the significant limitations of the software). You can change the dimension of the space just by changing the default values typed on the wall, finally, click on the “Create this project and Edit tab”.

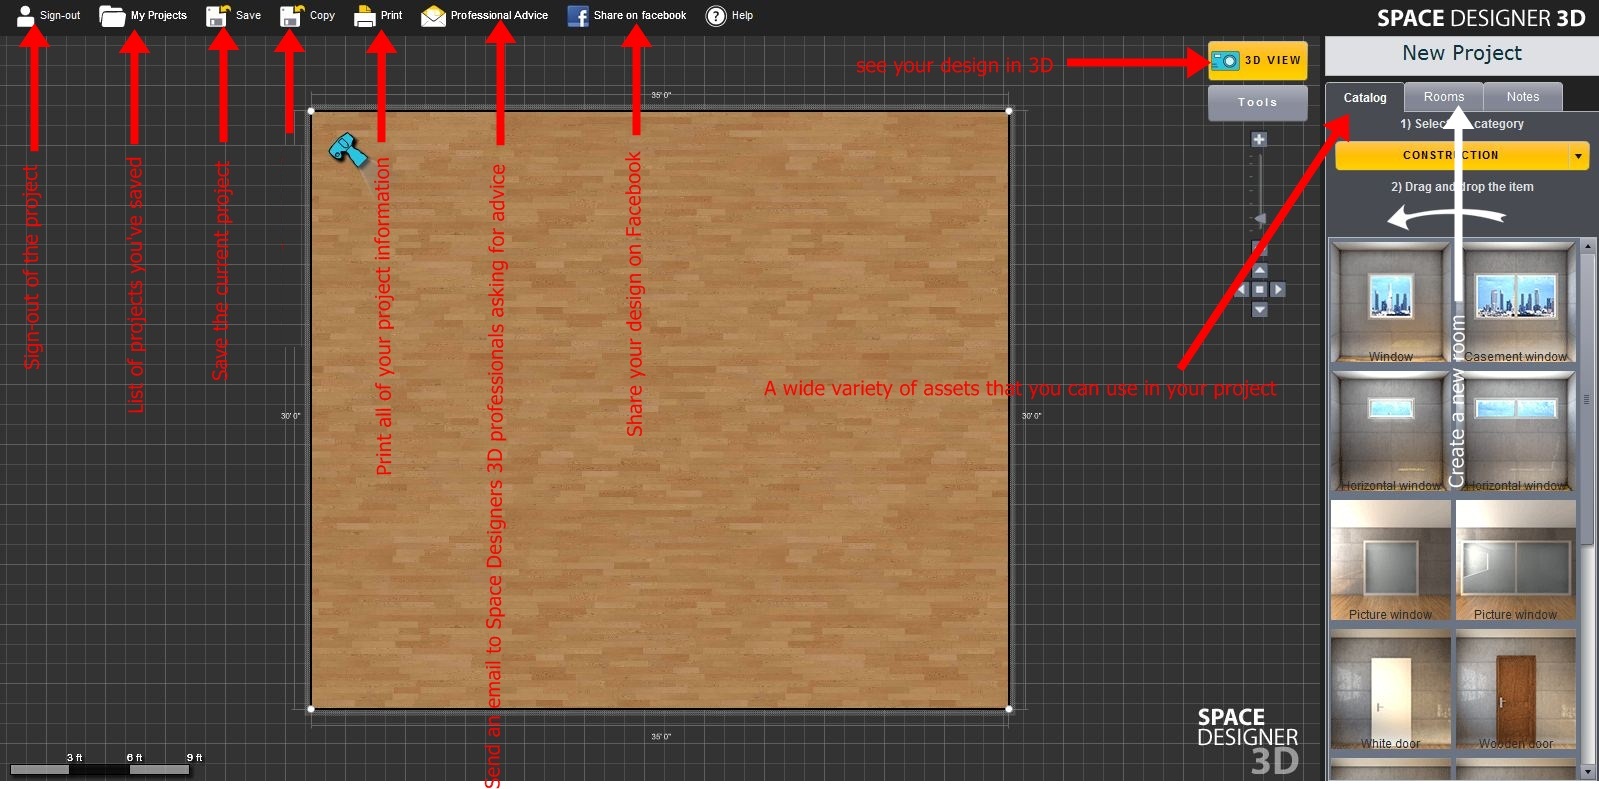
- You’ll then be directed to the main window, a detailed description of the interface can be seen in the screenshot below.

- First, we’ll add 2 windows to the room, which can be done by simply dragging the window you want from the catalog >> construction >> Casement Window and dropping it to the wall you want.

- To edit the dimension of the window (or any other type of asset) just click on it and a yellow “+” sign would appear, click on it and a window will pop up where you can edit the window.

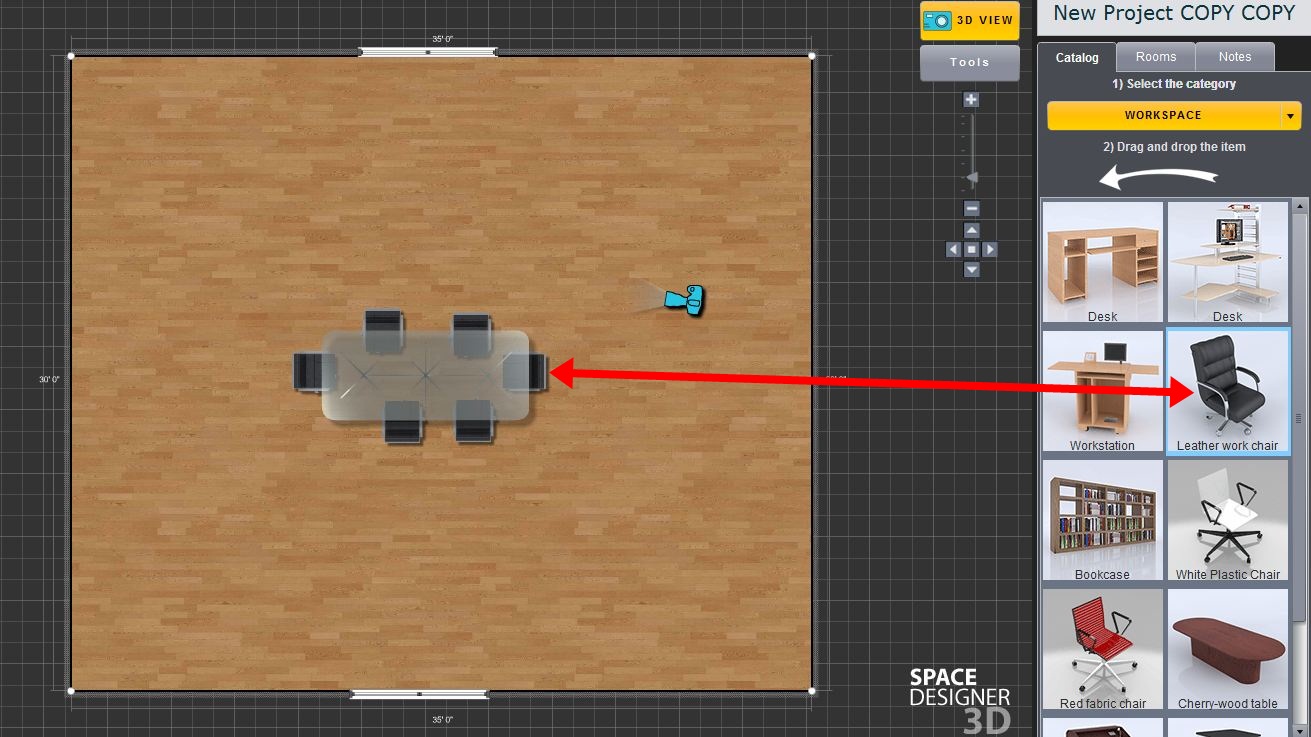
- Second, we’ll add a table in the middle of the room, drag a table from catalog >> dining room >> glass table and drop it in the middle of the room.

- Third, we’ll add some chairs, to do so just drag a chair from catalog >> workspace >> leather work chair and drop it where you want in the room.

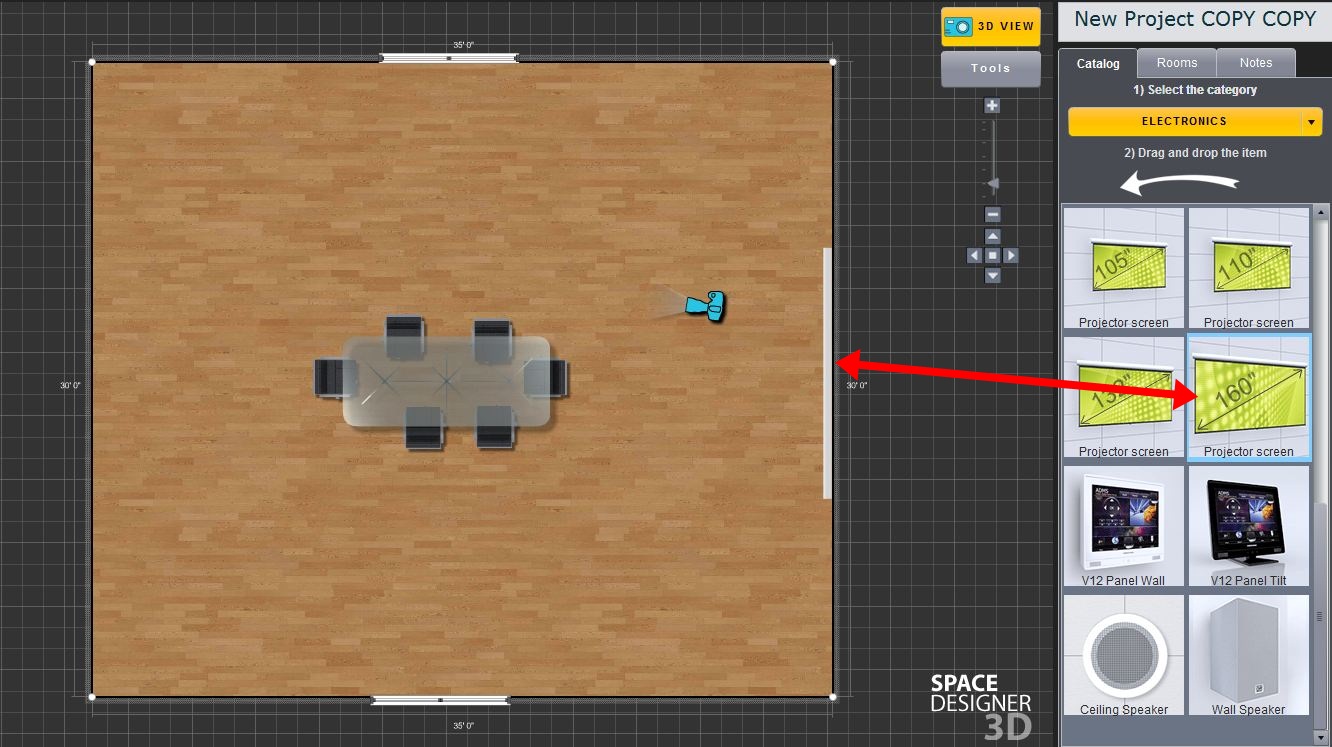
- Now, we shall add a projector screen, to do so just drag the projector screen from catalog >> electronics >> projector screen and drop it on the wall you want.

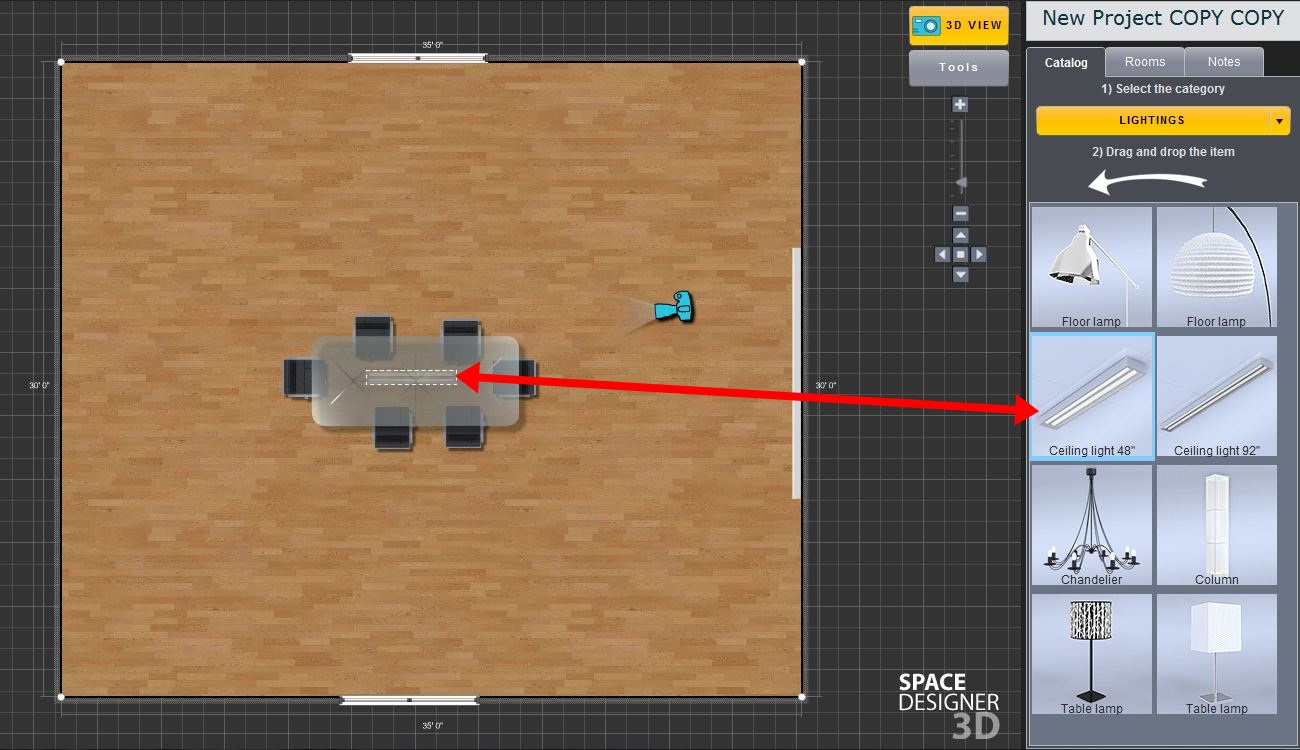
- Now, we want to add lights, again as everything else just drags light from catalog >> lightings >> ceiling light and drop it where you want in the room, you’ll notice that the light will be automatically attached to the ceiling.

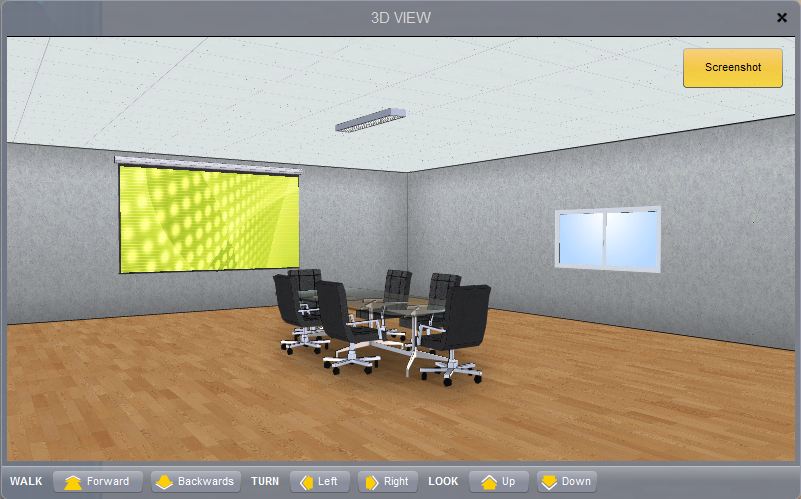
- Now, to see the room that we’ve just designed just click on the “3D View” tab and a new window will appear with your 3D design, you can navigate the room using either using the mouse or the on-screen buttons.

- You can use the same above steps to add more assets and change the design of the room. Now, we shall discuss the pros and cons of Space Designer 3D.


Pros
- Free.
- It’s easy to use.
- You don’t need to download any client on your computer.
Cons
- Very limited number of assets and you can’t add your own assets.
- You can only plan rooms; you can’t plan an entire house or working space.
- It has a very limited number of textures and colors for assets.
- There are no “Undo” and “Redo” buttons.
Verdict: Space Designer 3D is a good tool that you can use to plan a single room, but if you want to overcome the limitations of Space Designer 3D then you can use HomeByMe.com as it really provides a better alternative.