
How to Install CumulusClips on OpenShift
![]()
CumulusClips is a free self-hosted web application that allows any user create a video hosting website (Yes! Create your own YouTube), you can use this solution as a CDN for your website or a video portal for your business, or create a video portal for a certain niche i.e. woodwork, teaching, coding or even a private portal to share college videos, the applications are endless.
This guide will present a step by step tutorial on how to install CumulusClips on OpenShift, the only skill you’ll need during the tutorial is your ability to use a web browser. Before Starting this guide assumes that you already know how to use KeyBox with OPenShift, if you don’t then head to the post “SSH to Your OpenShift Applications From the Browser” to know how to use it.
Requirements
- A free OpenShift account, just go to OpenShift website and register using your email, no credit card is required.


Steps
- After registering; go to OpenShift home page and click on the “MY APPS” on the top of the screen.

- You’ll be directed to your log-in window just enter your credentials, you’ll then be directed to a new window click on the blue “Create your first application now” link.

- You’ll be directed to a new window, type “PHP, MySQL” in the search field, and select the application shown below in the screenshot.

- You’ll be directed to a new window, in the public URL; type the name of the project/application name (e.g. VideoPortal, MyTube, etc.) in the first space and the domain name (it’s not your real domain name, just any identification name e.g. NickName, YourName) in the second space.

- Under the public URL, there’s the source code slot, just copy and paste the following link “https://github.com/alx/CumulusClips.git”. It’s worth noting that this link is a fork of CumulusClips and not the official git repository.
- Leave everything as it’s and click on “Create Application” tab at the end of the page.

- You shall be directed to a new window where you shall find all of your “MySQL” credentials.

- You’ll then be directed to the main window and it’s time to go to your ” website” and start the installation process, to do that simply click on the blue link at the top of the screen (that’s your URL).

- Before starting the installation process of CumulusClips, we’ve to create some folders for the service to run on OpenShift, to do that we’ll use KeyBox, so log into your KeyBox account and use it to log into your CumulusClips application. in the command line type “cd app-root/repo/cc-core”.

- Then we’ll have to create a file called logs, to do so type “touch logs”.

- Then we’ll have to create permissions for the logs folder, to do so type “chmod a+w logs”.

- Now we need to create an upload folder in the cc-content folder, to do so first we need to change directory by typing “cd ..” note the space between the cd and the double dots.

- Now go to cc-content folder by typing “cd cc-content”.

- Now to we need to create the upload folder and change persmissins, to do so as with the logs folder above your type “touch uploads” and then type “chmod a+w upload”.

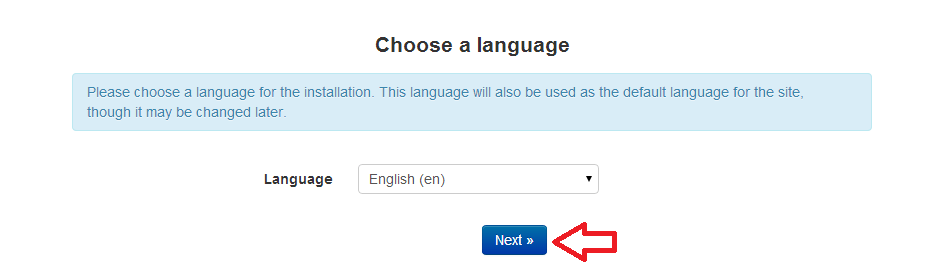
- Now you can click on the blue link from step 8 and you’ll be directed to a new window where you can start the installation process. In the first window just click on the “continue” tab.

- You’ll then be directed to a window where the CumulusClips installation process will check for the installation requirements, just click on the “continue to next step”.

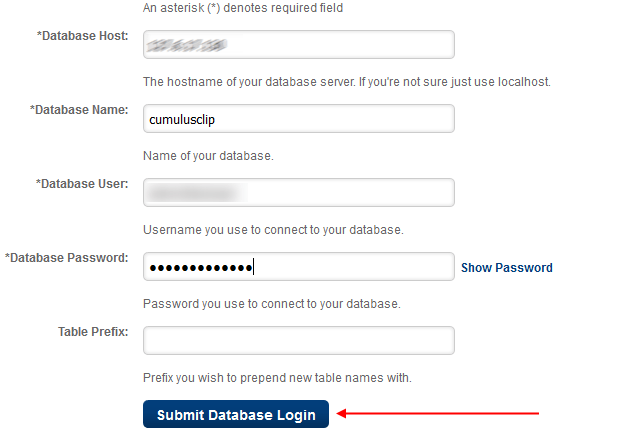
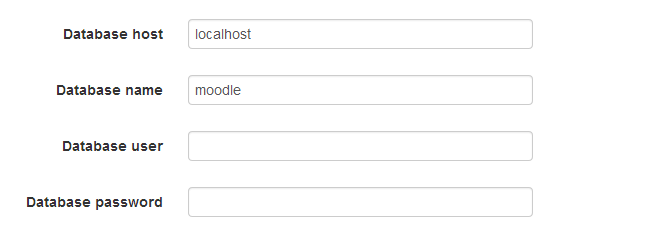
- You’ll then be directed to a new window, where you should enter some information like “password, database username, database password”, you can get this information from step “7”.
- In that window, in which you should provide your database credentials, there’s a small trick; which is getting your database Host IP, the easiest way to do so is to return to your application and click on the small arrow at the phpMyAdmin tab.

- A new window will pop-up just copy the number shown in the below screenshot.
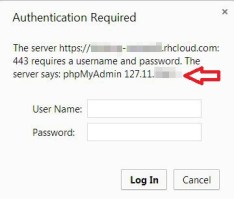
- Paste that number in the database host field in the CumulusClips installation, then fill in the rest of the information from your database credentials that you can find in your application, then click next.
- Then you’ll be directed to a new window where you should create your admin username and password.

- You’ll then be redirected to the backend (admin panel) of your portal, where you can control every aspect of your portal with a simple GUI.


To log into your portal froontend simply use the link from step 8.
Congratulations, now you’ve a fully functional CumulusClips portal running for free on OpenShift.