

![]()

Email is a crucial method of communication for any business nowadays, if you have a small business then you need to keep track of both your and your employees’ emails, you might also need to store them for prolonged periods of time for future reference. You might rely on a third-party service like Google or Microsoft for that or you might create your own, and here comes RainLoop.
This post will present a step by step guide on how to install RainLoop for free on Cloud9 for development purposes, please note that it’s not advisable to install a Production version of RainLoop on Cloud9 as the free tier isn’t designed for that intended purpose. Now, and without further ado let’s dive into the tutorial.
Prerequisite
First, you’ll need to sign-up for the free version of Cloud9.


Installation
Step One
After signing up and confirming your email, you’ll be directed to your dashboard, just click on the “create a new workspace” tab.


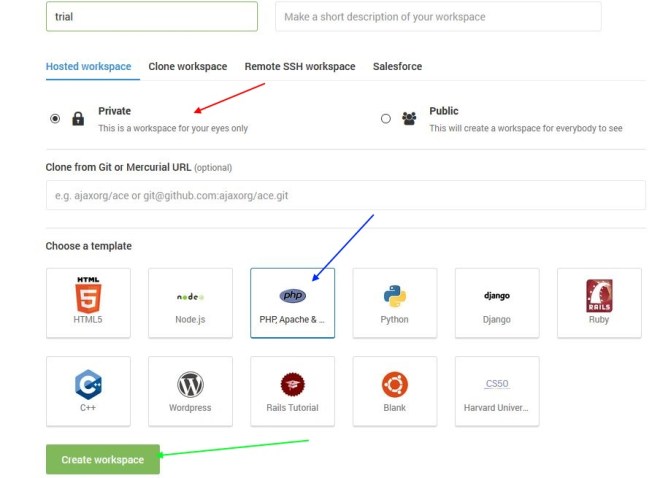
Step Two
You’ll be directed to a new window where you should configure your workspace, select the php option and then create the workspace.

Step Three
You’ll then be directed to your workspace, in the terminal download and install the latest copy of RainLoop with the following command;
wget -qO- http://repository.rainloop.net/installer.php | php
Step Four
After that step is complete just click on the “Run Project” arrow,then click on “Preview”, the installation window will appear in a browser-like window on the side of your screen.


Step Five
Now you’ve to log in as admin to do that just add the following to the address bar “/?admin”, use the username “name” and password “12345”.


Congratulations, you now have a fully functional installation of RainLoop on Cloud9, as it’s been advised above this installation should be for development purposes only and not for production.

