
How to Install Joomla Docker Container on Dply
![]()
Before proceeding please note that Dply services are no longer available
We’ve covered installing Docker on Dply.co in a previous post, this post will be a follow on to this post and we’ll use Docker containers to install a Joomla image on dply.co
This post will be an introduction to deploying web applications on dply.co using Docker containers, please note that the free tier of dply.co is only for 2 hours so you should only use it for trial purposes, of course, you can always pay to make it a production version/extending the availability of the VM.
Step One
Follow the first post to create an account and install Docker.
Step Two
In the terminal window, we’ll need to install Docker compose using the following command;
curl -L https://github.com/docker/compose/releases/download/1.12.0/docker-compose-`uname -s`-`uname -m` > /usr/local/bin/docker-compose
Step Three
You’ll then need to apply executable permissions for the binaries using the following command;
chmod +x /usr/local/bin/docker-compose
Step Four
In this step, we shall create the Joomla compose file from which we’re going to start the Joomla container, use the following command to achieve that;
nano docker-compose.yml
![]()
Step Five
Copy and paste the following commands in the newly created file and then close it, it’s worth noting that this is Bitnami Joomla image;
version: ‘2’
services:
mariadb:
image: ‘bitnami/mariadb:latest’
environment:
– ALLOW_EMPTY_PASSWORD=yes
volumes:
– ‘mariadb_data:/bitnami’
joomla:
image: ‘bitnami/joomla:latest’
ports:
– ’80:80′
– ‘443:443’
volumes:
– ‘joomla_data:/bitnami’
depends_on:
– mariadb
volumes:
mariadb_data:
driver: local
joomla_data:
driver: local
Source: https://hub.docker.com/r/bitnami/joomla/
Step Six
Now, we need to start running the container using the following command;
docker-composer up
![]()
Step Seven
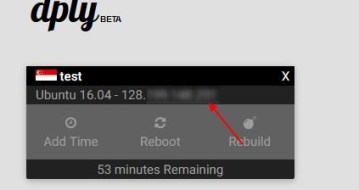
After the installation process is complete, you can log to your container from the browser using your IP address that you can get from your Dply dashboard e.g. (http://machine_IP).
Step Eight
Now, you’ll be directed to the Joomla installation window, just wait and it will start the installation automatically.

Step Nine
Now, you’ll be directed to your Joomla portal, use the username: user and password: bitnami to log in.

Step Ten
You’ll then be directed to your administrator panel.

Congratulations, you’ve successfully installed a Joomla container on Dply, we’re going to cover installing more web applications images using Docker on Dply in the following posts.