


Before proceeding please note that Dply services are no longer available
We’ve covered installing Docker on Dply.co in a previous post, this post will be a follow on to this post and we’ll use Docker containers to install a WordPress docker container on dply.co
This post will be an introduction to deploying web applications on dply.co using docker containers, please note that the free tier of dply.co is only for 2 hours so you should only use it for trial purposes, of course, you can always pay to make it a production version.
Step One
Follow the first post to create an account and install Docker.
Step Two
In the terminal window, we’ll need to install Docker compose using the following command;
curl -L https://github.com/docker/compose/releases/download/1.12.0/docker-compose-`uname -s`-`uname -m` > /usr/local/bin/docker-compose

Step Three
You’ll then need to apply executable permissions for the binaries using the following command;
chmod +x /usr/local/bin/docker-compose

Step Four
Now, we need to create a directory for the WordPress container, use the following command to create that directory;
mkdir wordpress
![]()

Step Five
First, we need to change directory to the newly created directory using the following command;
cd wordpress
In this step, we shall create the wordpress compose file from which we’re going to start the WordPress container, use the following command to achieve that;
nano docker-compose.yml
![]()

Step Six
Copy and paste the following command in the newly created file and then close it (save the changes before closing, Ctrl+x and then say “y” when you’re asked whether you want to save changes or not;
version: ‘2’
services:
db:
image: mysql:5.7
volumes:
– db_data:/var/lib/mysql
restart: always
environment:
MYSQL_ROOT_PASSWORD: somewordpress
MYSQL_DATABASE: wordpress
MYSQL_USER: wordpress
MYSQL_PASSWORD: wordpress
wordpress:
depends_on:
– db
image: wordpress:latest
ports:
– “8000:80”
restart: always
environment:
WORDPRESS_DB_HOST: db:3306
WORDPRESS_DB_USER: wordpress
WORDPRESS_DB_PASSWORD: wordpress
volumes:
db_data:
Source: https://docs.docker.com/compose/wordpress/#build-the-project
Step Seven
Now, we need to start running the container using the following command;
docker-composer.yml up -d
![]()

Step Eight
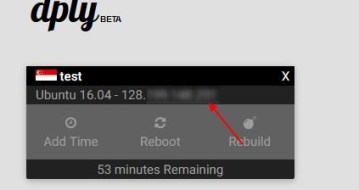
After the installation process is complete, you can log to your container from the browser using your IP aggress that you can get from your Dply dashboard plus the 8000 port, e.g. (http://machine_IP:8000).

Step Nine
Now, you’ll be directed to the WordPress installation window, select the language and click the “Next” tab.


Step Ten
Now, create your site name, username, password, and email, then hit the “Install WordPress” tab.


Step Eleven
Now, you’ll be directed to the login window.


Congratulations, you’ve successfully installed a WordPress container on Dply, we’re going to cover more Docker container installations in the coming posts.